Changed a service page URL and now some visitors are seeing “Page Not Found”? It’s an easy issue to miss during a website update, especially when the new page looks and works exactly as expected.
The problem is often the links left behind. Your menus, blog posts, ads, or search listings may still send people to the old address.
You can put that journey back together. Follow these steps to find the affected links, choose the right fix, and check that visitors can reach your service again.
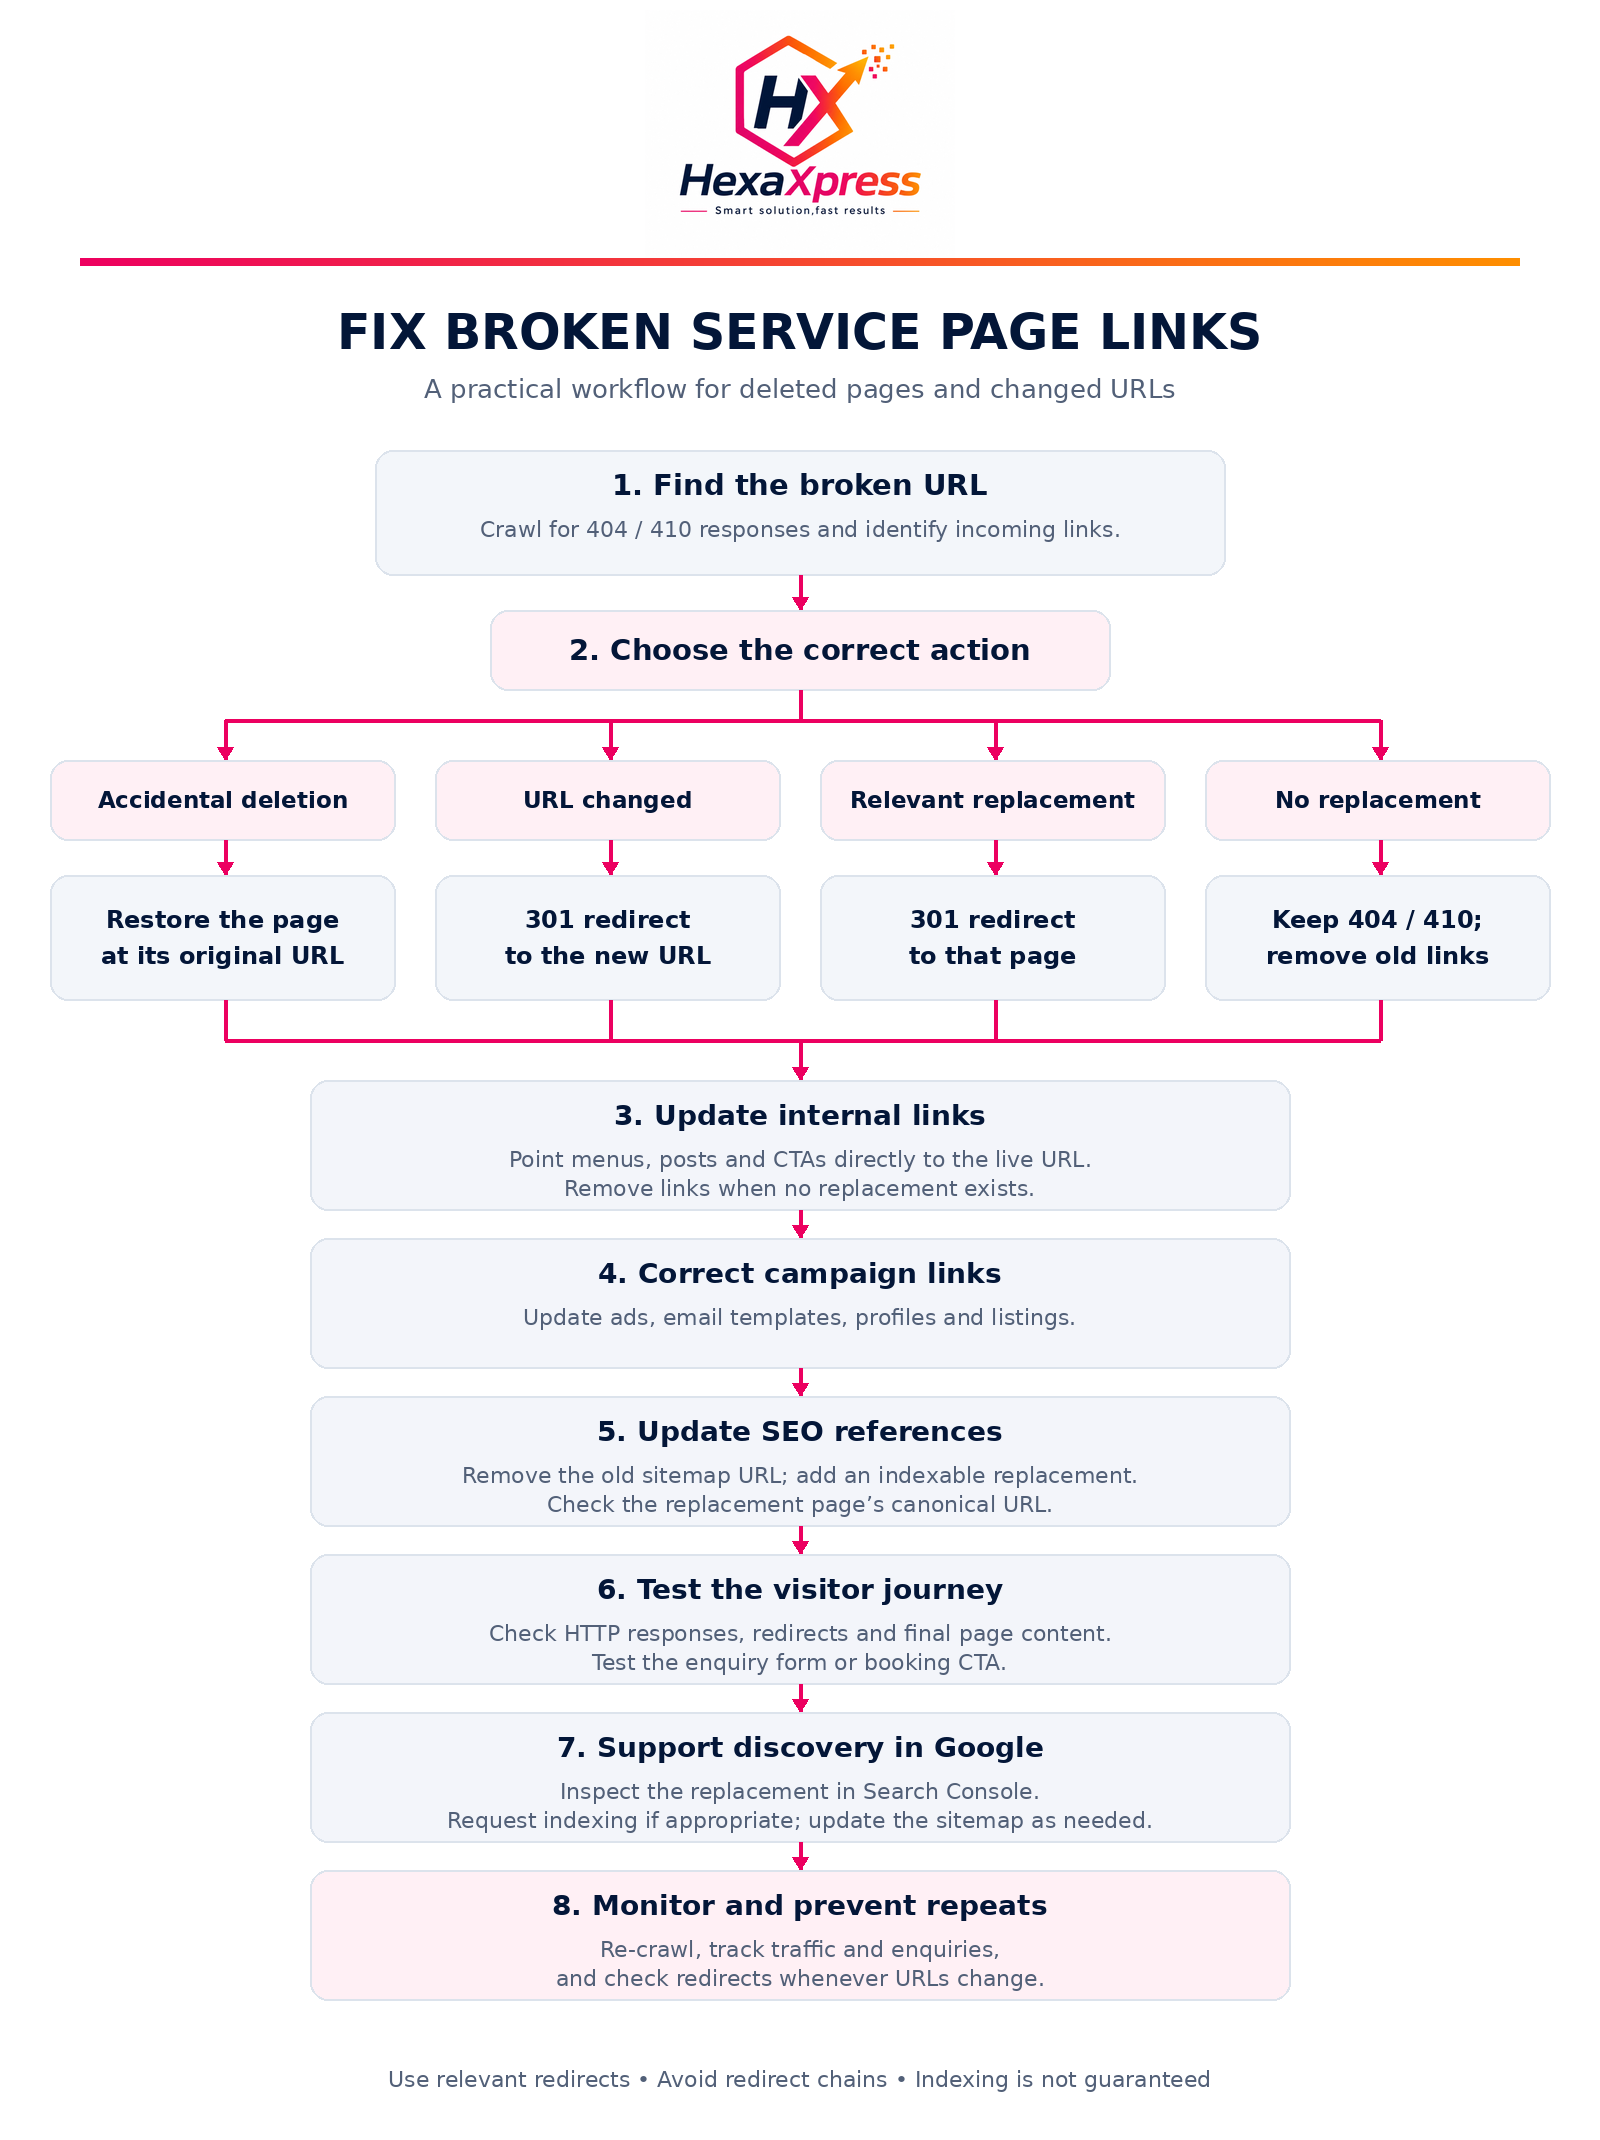
Download the step-by-step flowchart to help your team decide when
to restore a page, add a redirect, or remove outdated links.
Keep it handy for your next website update.
Step 1: Find the Broken URL and the Links Pointing to It
Run a website crawl using your SEO audit tool. Look for internal links whose destinations return 404 (Not Found) or 410 (Gone).
For each issue, record the unavailable URL and the pages linking to it. This gives your team a clear repair list.
Check active marketing links separately. A website crawl may not discover links in ads, emails, or printed materials.
Step 2: Decide Whether to Restore, Redirect, or Remove Links
The correct action depends on what happened to the page.
| Situation | Correct action |
|---|---|
| The page was accidentally deleted | Restore it at its original URL. |
| The service page permanently moved to a new URL | Add a 301 permanent redirect from the old URL to the new one. |
| The page was removed and a relevant replacement exists | Redirect to that replacement if it meets the original visitor’s intent. |
| The service was permanently removed with no relevant replacement | Keep a proper 404 or 410 response and remove links to the deleted page. |
| Check | Expected result |
|---|---|
| Old URL when a redirect is needed | Returns a 301 and leads directly to the relevant replacement. |
| Restored or replacement page | Returns 200 OK and displays the intended service content. |
| Permanently removed page without a replacement | Returns 404 or 410. |
| Updated internal links | Point directly to the correct live page. |
| Enquiry form or booking CTA | Works successfully. |
Testing the enquiry form matters: visitors need to be able to complete the journey after reaching the page.
Step 8: Help Google Discover the Replacement
In Google Search Console, inspect the replacement URL and request indexing if appropriate. Submit the updated sitemap if needed.
Requesting indexing does not guarantee inclusion or immediate recovery. It supports discovery after you have corrected the page and its references.
Step 9: Monitor the Fix and Prevent Repeat Issues
Crawl the website again to confirm that the affected internal links are resolved. Monitor visits and enquiries to understand whether the customer journey is recovering.
For future updates, make these checks part of the publishing process:
- Decide what happens to the old URL before changing it.
- Configure any required redirect when the change goes live.
- Update internal links, campaign destinations, and sitemap entries.
- Test the final page and its enquiry or booking flow.
- Schedule regular crawls to catch newly broken links.
Start with restoring access, then correct the links that send visitors there. Making these checks routine will help your next website update run more smoothly.
For the business context behind these checks, read How Broken Service Pages Can Cost Your Business Leads and Sales.

Exploring technical SEO, content strategy, search visibility and AI search through research, testing and clear documentation.
Categories
- Internal Linking (2)
- Search Intent (3)
- SEO Content (3)
- SEO Lab (1)
- Technical Investigations (1)
- Technical SEO (2)
Quick navigation
Table of contents
Explore this article
Don’t miss what’s next.
Join the HexaXpress newsletter for actionable digital insights.
Continue exploring
Related Articles



Keep your digital edge.
Explore more practical ideas across AI, SEO, technology and business growth.